
"The hardest part of this for beginners is usually the cleanup," Mike said at the start. "It's a lot of filing. That's what breaks people."
"Oh," I said. "Well, that shouldn't be a problem. I've done filing."
Going into this, I was worried about many things. The measuring, the cutting, the alignment, the brazing. But filing I could handle. I thought back to my days of intaglio printmaking (etching on metal plates). The person who taught me insisted that everything had to be done from scratch and manually - from cutting sheets of metal to preparing the plates. The latter involved beveling the edges at just the right angle, then endlessly filing, sanding and buffing them until the bevels were perfectly even and smooth, polished to a mirror finish. His insistence on this level of prep work had more than a few students in tears before we even touched ink or got anywhere near the press. But for some reason I stuck with it, eventually got the hang of it, and continued to use this method after I began to work independently. It just didn't feel right to do it any other way. Now whenever I see an etching, I can't help but look at the edges in search for file marks. All of this is to say, the prospect of filing for hours did not frighten me.
So how do I explain what happened a week ago? I don't want to exaggerate it into some dramatic melt down, but it was certainly a low point. A very long day, throughout the course of which I grew increasingly quieter and less bouncy than I had been up to that point. This was supposed to be the last day. So maybe it was the discrepancy between having believed I was almost done, and discovering more and more little things needing to be finished. All these little things added up, and taken together amounted to a lot of work. Bridges, bottle cage mounts, eyelets, braze-ons for cable routing.I had been awake since 5:30am. By 5:30pm, I was so tired that I had a hard time focusing. By the time we mocked the whole thing up to make sure the wheels, tires, rack and brakes all worked together,I was no longer fully present. At this stage we decided that the frame was finished - "good enough." But the feeling of satisfaction or at least catharsis that I had expected at the end did not come.
At home later that evening I did nothing and thought of nothing, feeling utterly dejected. It wasn't until the following day that I could even get myself to look at my pictures of the finished frame. And then I finally felt something: panic. "Good Lord, how could I leave it like this? This is notfinished!" I could see smears of brass and silver. If I zoomed in closely enough, I could make out uneven surfaces. I had filed away at these areas, but apparently not enough. Mike had been right: like most first timers, I had flaked out on the cleanup. With horror, I imagined him powdercoating the frame as it was, uneven shorelines and all. Or, worse yet, putting the finishing touches on it himself, whilst chuckling "I knew the finishing would get her!" So I phoned him, trying to stay calm. He had not powdercoated the frame yet. And yes, fine, I could come over to continue working on cleanup. This put me in a fine mood.I showed up bright and early on a Friday morning full of energy.
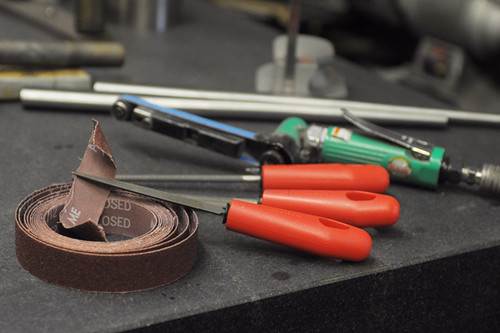
Somehow I maintained that energy for an entire day of using nothing but some files and emory cloth strips. All I did from 9:30am until 5:30pm, with a break for lunch, was file and sand, and it was tremendously satisfying. I guess having reached that low point my previous time at the shop, there was nowhere to go but up.
Mike had to go out for much of the day, and I was mostly on my own working on this. Not being able to seek feedback (Does this part look even? Did I file too much in this spot?) added a new layer of excitement to the process. When he returned, I think he was pretty amused by how cheerful I was after being at this for hours.
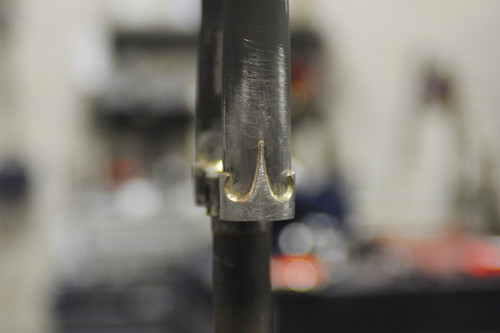
One of the trickiest parts to clean up was the area around the Grand Bois fork crown. Those curly-cues make it difficult to get the file into that little space and chisel away at the extra filler material without gouging the crown or blades in the process. It took me longer to get it to this state from this state, than it did to do the initial post-brazing cleanup. The trick is to dig into the shoreline build-up with the tip of a file, then angle the file just so to lightly and gingerly clean up the rest.
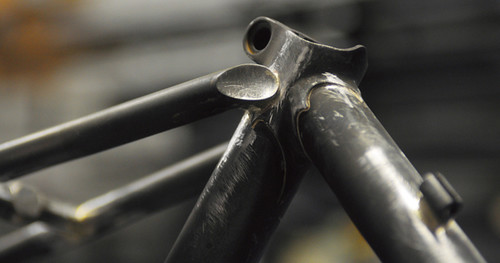
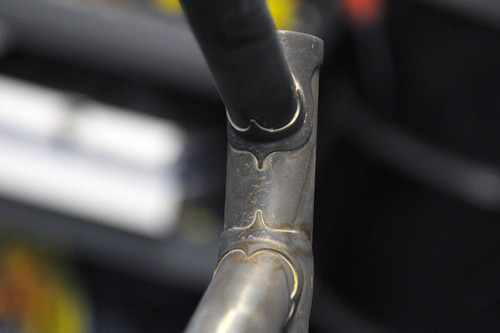
But the most challenging part of all was the seat cluster. My beautiful seat cluster! We made the seat stay caps from scratch to look exactly the way I wanted; it was the coolest thing ever. But during brazing I got a bunch of silver all over the caps, and was now terrified that in cleaning them up I would ruin their perfect concave surfaces. So ever so lightly, I dug into the tiny bulges with the tip of a file, using the most delicate micro-movements I was capable of to remove the filler material but not the steel underneath, then polished with an emory cloth until I got the stuff off. This took a while!
And so it went.The pictures here show the frame close to the point where I stopped, but not quite there.I didn't have the energy for pictures by the time I was done.
If you are wondering about the uneven looking surface from the sanding marks, they disappear after the frame gets sandblasted. The headlugs started out looking like this after brazing, then this, and eventually ended up as you see them above.
Don't get me wrong: The finishing on my frame still isn't "good" by real builders' standards. In fact I would not mind continuing to work on it, but unfortunately we are out of time. But at least now I can live with the state I left it in. And no matter how the bike turns out, I got the feeling of catharsis and closure I wanted out of the process. I learned how to build a bicycle frame (and fork!), from start to finish.
No comments:
Post a Comment