(Photo: Coming up the 5.8 pitch one of Mr. P's Wurst.)
So nice to be back home in the Gunks.
After nearly two months away, I longed for the old familiar climbing surroundings.
The overhangs.
The pitons.
The long reaches.
The horizontals.
I was climbing with Margaret on an October Sunday. She wanted some easy leading and our first target was Three Pines. Unfortunately Three Pines at 9 a.m. already had a party of three on the first pitch and another pair at the base waiting to start. This was hardly a surprise on a Sunday during peak season.
My general policy is not to wait for climbs in the Trapps. In my experience, you always find something else open if you keep looking. Sure enough, we went a little further down the cliff and found Minty (5.3) available so we were in business.
Margaret led pitch one. I think this pitch is a great introductory Gunks lead because it has an early move that seems several grades harder than the rest of the climb. This might not seem like an ideal situation for a new leader to deal with, but it happens all the time on climbs of every grade in the Gunks. You have to confront it eventually, so you might as well start to get used to it when you're leading 5.3!
On Minty, the move can catch you by surprise. You start up this little corner. A big shelf is right there for you to grab, just one step up. But the feet are these tiny, polished little half-pebbles. You have to trust your feet just long enough to step up to grab that ledge.
The move should be no big deal.
But it seems totally possible you could fall here.
So you stand there thinking "This is supposed to be 5.3! How can I be such a failure that I am worried about this little move on a 5.3??"
And you psyche yourself out.
And you try this, and you try that, desperate to avoid this tenuous little step.
Finally you just do the stupid move and feel like an idiot.
Welcome to the Gunks.

(Photo: Past the crux on pitch one of Minty (5.3).)
The other hazard on Minty is that you might go up the wrong corner. The climb keeps moving left, and all the corner systems look alike. The first time I did the route, with Liz, she went up too soon, when she should have continued moving left. But if you make this mistake, you'll likely end up on Tipsy Trees, which is another nice 5.3. So no worries.
To stay on track you should look up for the distinctive Minty tree. It is a pine tree over 100 feet up that sticks out sideways from the cliff. This tree is where pitch one ends. If you keep in mind that you are heading for this tree, you should find the correct route.

(Photo: The 5.2 pitch three of Minty.)
Minty has lots to offer. The steep, juggy climbing you'll find in the second half of pitch one and all of pitch two is especially nice. Pitch three goes at a very casual 5.2 and it isn't terribly long, but it too has good moves out from a corner system and then up jugs to the top.
My personal preference for descending from climbs in the Minty/Snooky's area is to walk a short distance to the bolted rap route at the top of the Madame G buttress. Using the bolted rap route guarantees a safe descent and avoids throwing ropes over nervous leaders on very popular climbs. The problem with this method is that the Madame G rap starts from the GT Ledge and you have to follow your nose and downclimb from the top to find the bolts. If you aren't already familiar with the location it will be hard for you to find it. In the past I have spotted the distinctive tree which grows out at an angle from the cliff right next to the rap bolts, but I must have done this at a time of year in which the trees have no leaves. Last weekend with Margaret I couldn't spot the correct tree from the top and I had some trouble finding the bolts, overshooting the right path and having to work my way back. Still, I prefer these few minutes of hunting to rapping off of the manky anchors which come and go atop the cliff.
Coming down, I could see it wasn't going to be easy to get on another three-star classic. The cliff was looking very crowded. There were parties on Madame G's, on Finger Locks or Cedar Box, on Hyjek's Horror, on almost every climb in sight. Was this a nature preserve? It bore a greater resemblance to Occupy Wall Street.
I suggested to Margaret that we do an empty climb right in front of us: Mr. P's Wurst. The climb, which ascends the right side of the Madame G buttress, is almost always open, even though it sits amidst some of the most popular routes in the Trapps.
I've been wanting to get on Mr. P's for some time, in part because I like the name, which Ivan Rezucha and Rich Perch bestowed on the route in the best Hans Kraus tradition.
Hans put up Madame G's (full name: Madame Grunnebaum's Wulst) in 1943. How many climbers understand the bawdy humor in this classic route's name? I'd wager that very few get the joke. As Susan E.B. Schwartz explains in her biography Into the Unknown: the Remarkable Life of Hans Kraus, the name was not inspired by a real person. Instead, Hans looked up at the buttress and saw two bulges up high that-- to his one-track mind-- resembled a woman's bosom. The route he created begins at a pine tree and weaves between the two breast-like features. Grunnebaum is German for green tree and wulst means bulge. Thus the route's name can be translated in full as "Mrs. Greentree's Boobs."
Once you understand the humor in Madame G's name, the meaning of Mr. P's Wurst becomes obvious. The latter route snakes up right next to Ms. Greentree's bulges, and what could be better nestled in those bulges than Mr. Perch's sausage?
Apart from the name, what interested me about Mr. P's was that no one ever seems to do it. It is always open, despite the fact that Dick Williams decided to anoint it with two stars in his 2004 guidebook. Dick also did his part to make the route more accessible, describing a new start from 50 feet up the gully to the right of the buttress instead of the 5.6 R climbing previously needed to get established on the route.
I think this new start is actually one of the reasons the crowds stay away. The gully looks unappealing and from the ground it is hard to see exactly where you're supposed to jump onto the wall.
It looked to me as though the right spot was about five or ten feet below the rap bolts that are on the other side of the gully. We decided to do pitch one of Northern Pillar (5.1) instead of climbing the gully, with Margaret leading up and cutting left near the top of the pitch to set up a belay either at or near the bolts, from which point I'd decide exactly how to get over the gully and onto the wall for Mr. P's.
Margaret ended up building a belay to the right of the bolts, in order to avoid having parties constantly rapping through as she stood there waiting for me. This worked out fine, although I think it would have been okay to use the bolts so long as she set up on the left side of them. It seems to me that when people rap and pull the ropes from above they usually fall just to the right of the bolts. So if Margaret had anchored into the bolts but stood to the left she would probably have been unaffected by the rapping parties. In the final analysis, it would have been simpler just to go up the gully.

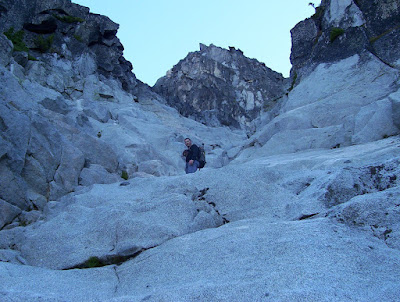
(Photo: Approaching the crux of the 5.8 pitch one of Mr. P's Wurst. From the photo you can get some idea how overhanging the final bits of the pitch are. The other climber in the photo is on Madame G's.)
From our belay at bolt level, I traversed to the gully, downclimbed a few moves, and then made the step across to the other side. These moves are easy, but if you do it this way you need to place pro as you step down, and then again at the other side of the gully, if you want to protect your second. Again, probably it would have been better just to go up the gully.
Now I was finally on Mr. P's. The pitch wasn't difficult to follow. Good holds lead up and around the corner until you find yourself on the right side of the face of the Madame G buttress. The climbing is juggy throughout the first pitch, and the rock quality is generally good. The angle gradually steepens until it becomes overhanging for the last ten to fifteen feet of the pitch. The crux move comes at three ancient pitons. I equalized the lower two and then clipped the third one as well, hoping at least one of them would hold in the event of a fall.
A big move up to a bomber horizontal, a good cam, and another move up to a tenuous stance finished the pitch beneath a roof.

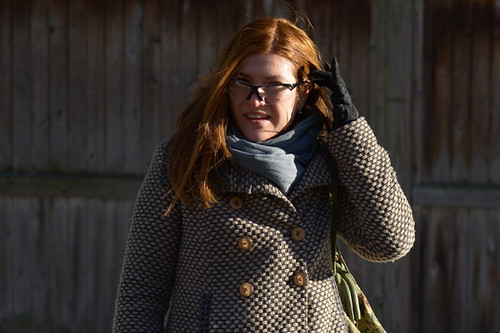
(Photo: Looking down from the hanging belay at the end of pitch one of Mr. P's Wurst (5.8). My belayer Margaret is in blue. The climber in red is descending by the bolted rappel route.)
I found the hanging belay suggested by Dick to be rather unpleasant. There are two ancient pins, plus enough horizontals to place a few cams. It isn't unsafe, but it is truly a hanging stance; I couldn't let go with both hands in order to set up my anchor. Equalizing the cordalette and tying it in a knot with one hand wasn't easy.

(Photo: Approaching the hanging belay at the end of pitch one of Mr. P's Wurst (5.8).)
Pitch two is rated 5.7+. I followed Dick's instructions exactly, moving through the roof at the break and then stepping left. The move was fun and well-protected (you can get a good cam in the break in the roof), but I thought it was a big, reachy move, definitely harder than 5.7. It reminded me of the crux moves on Maria Direct and No Glow, both 5.9.
The rest of the pitch was easier, but still good. Getting past another roof on its right side requires a couple more interesting moves, and then the route joins Madame G's to the finish.

(Photo: Just over the roof on the supposedly 5.7+ pitch two of Mr. P's Wurst.)
After I pulled up the rope and put Margaret on belay, she immediately took a fall. Then she seemed to have no trouble climbing the pitch. She told me when she arrived at the top that she'd tried the roof my way, found it ridiculously hard, and then had moved four feet or so to the left, where she found 5.7 climbing up past the roof.
So maybe Margaret's way is the right way to do it, since it is 5.7. But it isn't how Dick describes the route. Personally, I enjoyed pulling the roof, and I did exactly what Dick instructed me to do, but if you do it this way the roof move is the hardest move on the whole route, and the 5.7+ pitch becomes more like a 5.9-. So you make your own call.
I would gladly climb Mr. P's again, but I would do it differently. I would just go straight up the gully rather than deal with the bolted rappel freeway and the downclimb/traverse. And I think I would bring a few extra cams and runners and do it in one pitch all the way from the ground to the finish on the GT Ledge. This would avoid the unpleasant hanging belay. And then you'd get one super long pitch of juggy steep climbing, wholly in keeping with other great climbs on the same buttress, like Columbia (5.8) and Madame G's (5.6).
If you do it this way I'm sure you too will end up a friend to Mr. P.


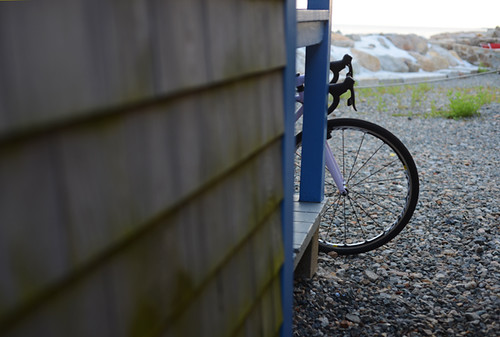
 ilities. I've included several photos here from this trip to whet your appetite.


 With a blizzard raging outside, what better way to spend an evening than working on bikes? The Co-Habitant agreed to help with my Gazelle (and by "help" I mean "do most of the work"),in exchange for which I prepared lavish portions of a dish that is sort of a cross between French Toast and a Croque Monsieur - only larger, fluffier, more generous on the cheese, and with some secret herbs that make it special. He likes my cooking, I like his mechanics: win-win!
 Though I bought new tires for my Gazelle months ago, we had been procrastinating with their installation, as it required dealing with the formidable chaincase. Removing it seemed complicated. And who knew what was under there after all these years?
 TheGazelle'schaincase is a vinyl casing that is stretched over a metal support structure.It is clipped and fastened at several attachment points - including an amazing system of clasps along the bottom, the likes of which we have never seen before. I am not certain how closely the current-production Gazelle chaincase resembles the one on my 15-year-old A-Touren model, but mine was not exactly easy to remove and install - not a project for beginners at least.
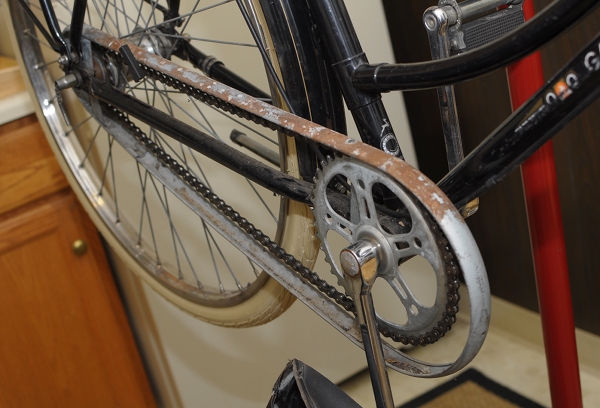 Once removed, this is what was inside. It's entirely possible that the drivetrain has not been worked on since the bicycle was first purchased by the original owner. The metal structure supporting the vinyl casing was covered in surface rust, as were parts of the chain itself. But otherwise, there were no apparent problems. These bicycles were built to be used and abused for years without any need for maintenance.
 We were disappointed to see that the chainring did not have little gazelles carved into it like the older ones did. But I suppose that would be too much to expect from a '90s model. The metal chaincase support structure disassembles into several parts - allowing the rear portion to be removed without taking the whole thing apart.
 The main chaincase attachment bolt is on the chainstay - a more secure method than attaching chaincases or chainguards to the bottom bracket. Another point of attachment rests on the rear axle. While more difficult to tinker with, the benefit of the vinyl chaincase design, is that it is less likely to rub or knock against the chain. It also weighs less than plastic or metal chaincases - though somehow I doubt that was a concern for the makers of Gazelle.
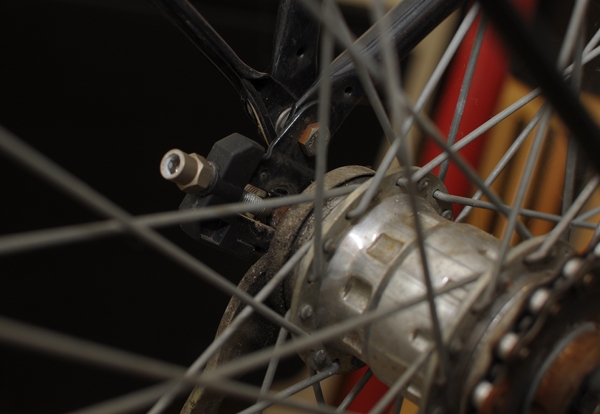 The Co-Habitant was thoroughly impressed by the design of the GazelleA-Touren's rear triangle, and believes it to be a better (more integrated) system than that of the vintage Raleigh DL-1 or of the modern Pashley.
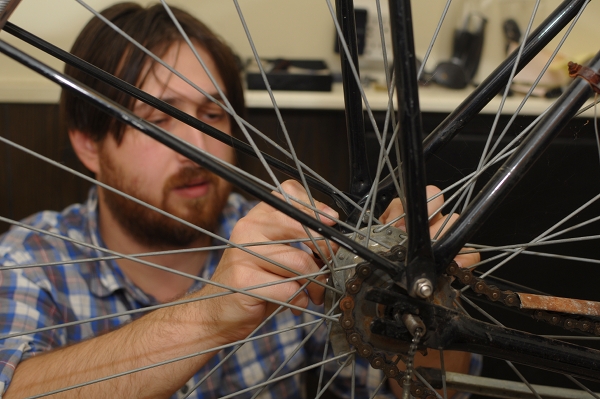 Everything on the Gazelle fits together just so, as if the parts were all custom-made for each other. And once the chainguard is off, the fork ends are cut in such a way, so as to facilitate wheel removal. The 28" wheels with the stainless steel rims weigh a ton.
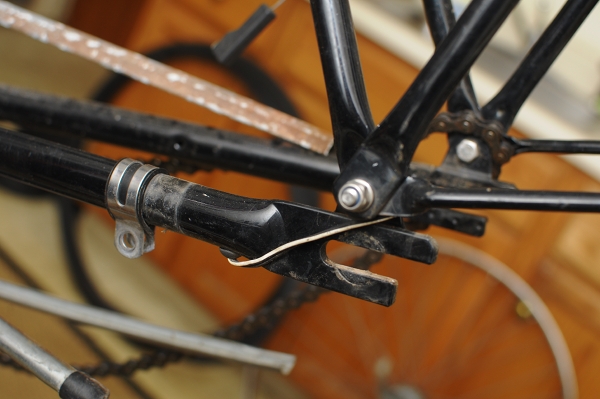 The routing of the tail light is entirely internal: The wiring comes out of the chainstay right next to the fork-end, and snakes along the inside of the rear fender invisibly. These are the kinds of design elements that make this bicycle a fully integrated system - almost an organism - that experiences very few problems. There are fewer things to shake loose, break, or fall out of adjustment, which is what makes it so low maintenance.
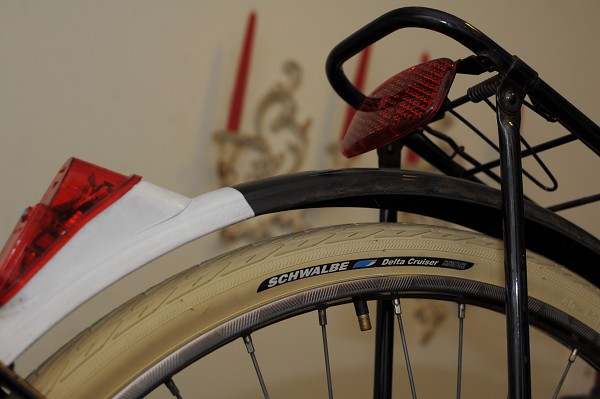 I know that some enthusiasts would have next taken the whole bike apart, scrubbed off the rust, polished the frame and components, and put it back together - but we prefer to let functional bikes be. Having checked the drivetrain, none of the components seemed to be any worse for wear despite some cosmetic degradation, so we just cleaned them up a bit, greased everything, adjusted the brakes and shifter, and closed the whole thing back up. I will replace the chain soon just in case, but that is about it. Changing the tires on this bike was easy, and the cracked originals are now replaced with newSchwalbe Delta Cruisers. We also removed the vinyl dressguards and are replacing them with something more personalised. The snow continues today, but by the time it is over the winterised Gazelle will hopefully be ready for her test-ride. Working on this bicycle has made us both appreciate just how well it was built. I know that the current-productionGazelles differ in the way they are constructed, but I hope that they retained at least some of the ingenuity of the original design.


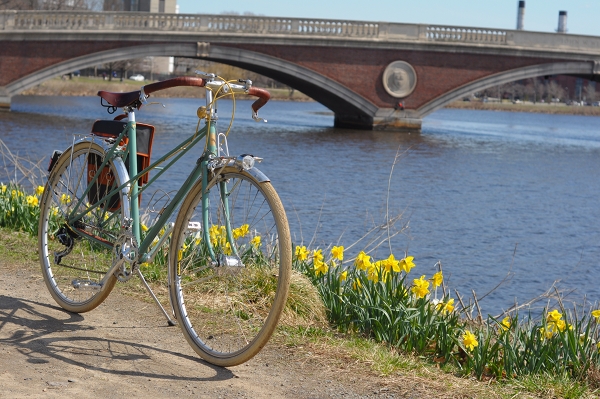 I was having a political discussion with a friend over email, and in response to something I wrote he replied: "You know, it's really starting to show that you haven't been out of the US in almost a year." Ouch... But the "insult" aside, I realised he was correct: I haven't been out of the country since last July, which is unusual for me. Moreover, we have been without a car since December, making our travel radius limited to cycleable distances. Without explicitly being aware of it, I have transitioned from living "globally" to living "locally," and my friend's insinuation was that this has made me narrow-minded and provincial. Has it? I think not, but I also realise that I don't really care. My quality of life has improved as a result of the changes I've made since last year, and that's difficult to argue with.
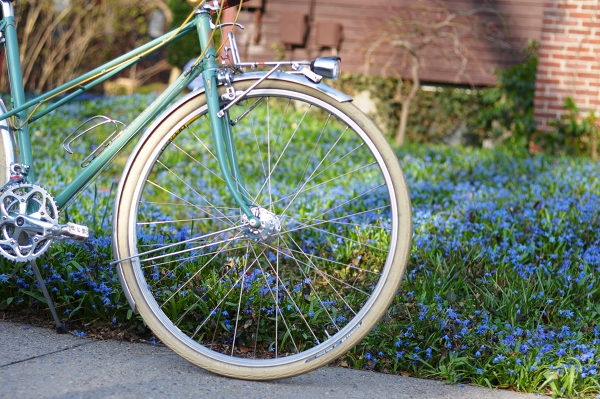 But the issue of living locally vs globally has personal, psychological implications as well, and these have been on my mind lately. I have an unusual personal history, and have basically never lived in any one place for more than several years at a time. As a result, my life has been fragmented and unstable, which I do not feel is ultimately good for me.When I remember things from my past, I sometimes get confused about the location of an event, and even about the language that was spoken.With my friends, relatives, experiences and memories scattered all over the world, it is difficult to maintain a sense of continuity and even a coherent sense of self. Forming healthy attachments to new people and places is challenging, and replacing the physical reality of personal interaction with virtual communications is isolating.
 I thought that I might feel limited and stir-crazy once I stopped traveling abroad, and even more so once we began living without a car. Instead I am feeling as if some long-neglected human aspect of me is waking up. Living locally and all that it entails - seeing the same people, experiencing the change of seasons while staying put, and developing a feel for manageable distances - is giving me a sense of continuity that I have been lacking.