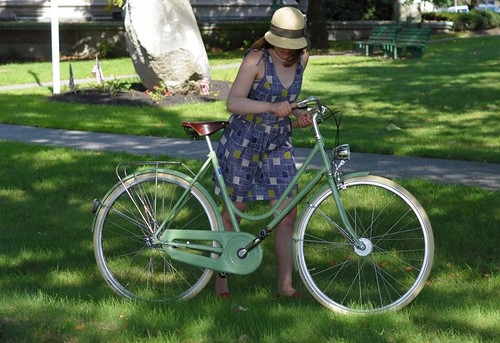
Fashionably late and appropriately glamorous, the
Bella Ciao Superba is here! I was nervous up till the moment I saw it, but the bicycle is perfect. The pre-ordered bikes should be off to their owners very soon.
To recap for new readers, this is the result of a collaboration between myself and
Bella Ciao, and you can read about it here and here. Twelve bikes were made as a special edition and they are available exclusively at
Harris Cylery in West Newton, MA. I know that a good portion of them have already been sold, so please check with
Harris for availability. The price is $1,495. I am not the one selling the bicycles (and I do not receive commission on the ones sold), so please contact
Harris directly with all sales inquiries.

The
Bella CiaoSuperba frames were handmade in Italy, using
Columbus Thron tubing. The frame size is 54cm, with 700C wheels. Tires are the cream
Schwalbe Delta Cruisers, 700Cx35mm. The wheelsets are proprietary to
Bella Ciao, made inhouse.
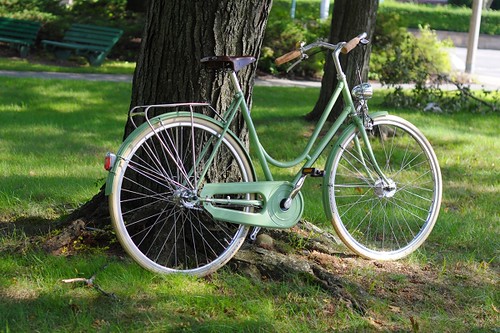
The Superba includes all the components and accessories pictured here, which I will detail below. It is a 3-speed bicycle with a rear coaster brake and front handbrake, internally routed dynamo lighting front and rear, leather
Brookssaddle, natural cork grips, chaincase, and a handmade rear rack.
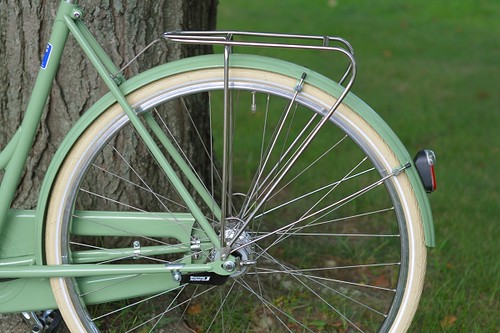
The stainless steel racks were designed by me and handmade in Dorcester, Massachusetts by
Trimount Ironworks. They are rated to carry 18kg (40lb) of weight, provide attachment for bungee cords, and will accommodate a variety of pannier systems.
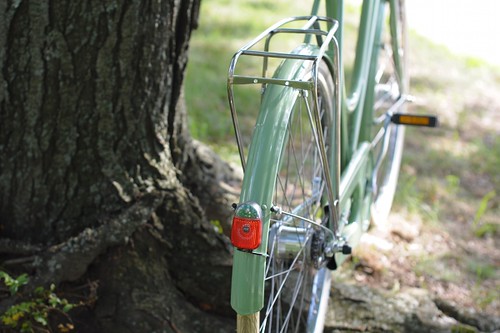
There is a provision for attaching a battery-operated tail light to the rack, for those who wish to supplement the dynamo lighting.
One thing I like about the stainless rack with its thin tubing, is that it has the effect of being "invisible" on the bike. I've played around with a number of different racks, and this definitely suits the bicycle best. I may write a separate post about the rack design in the near future.
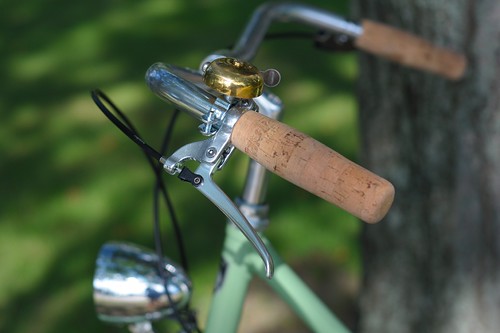
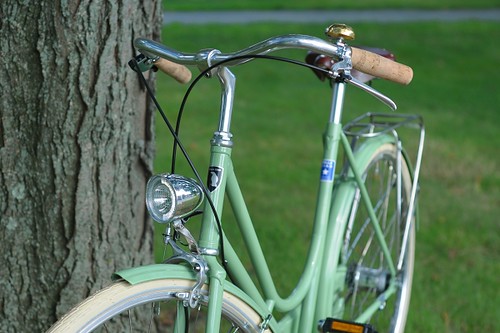
The high-polished alloy handlebars are made by
Bella Ciao. I would describe them as a hybrid between North Road and Porteur style bars, and they are possibly my favourite handlebars on the market today.

The bike is fitted with natural Portuguese cork grips from
Rivendell and elegant
Tektro city brake levers. The cork grips will be left unfinished, but they can be shellacked by the owner - which will make them darker. The brake lever can be placed either on the right or on the left.
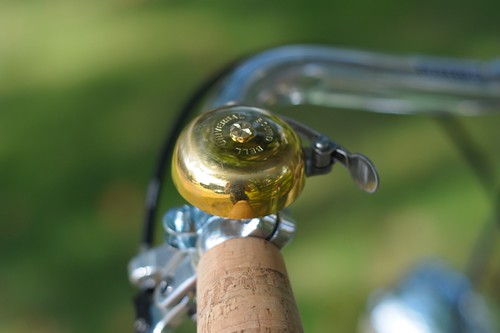
Brass bell, of course.
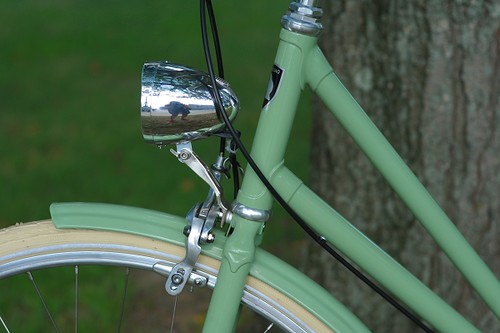
The dynamo-powered lighting is by the German manufacturer
Buechel.
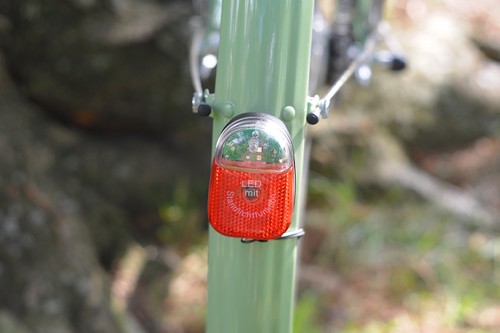
It looks fairly classic and unobtrusive, and works nicely.
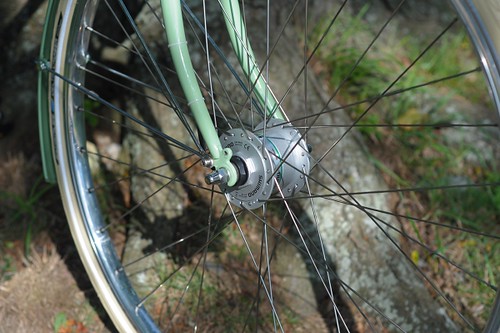
The dynamo hub is Shimano. The wiring is routed externally up the fork, then internally through the frame, exiting through one of the chainstays.
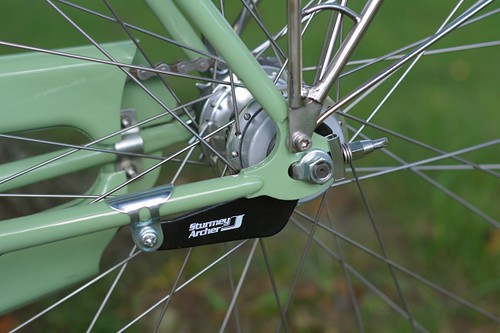 Sturmey Archer
3-speed coaster brake hub.
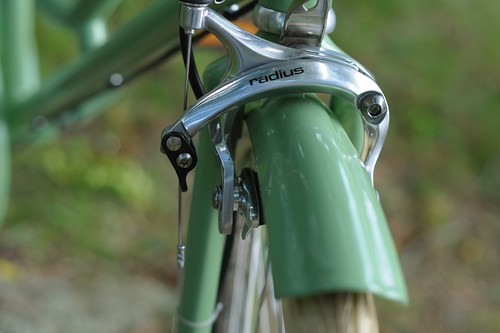
Front caliper brake.
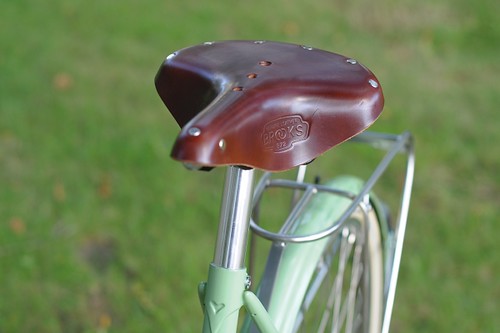
Brown
Brooks B72 saddle.
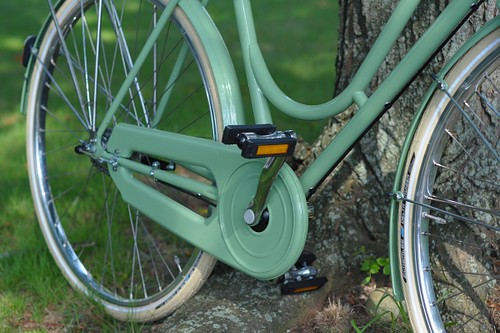
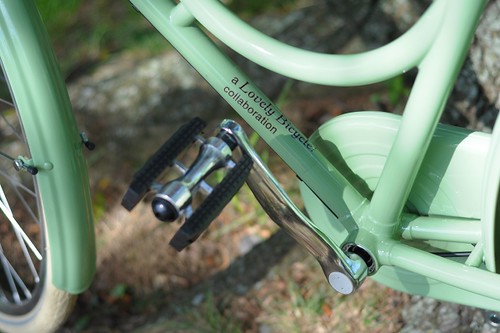
Non-slip platform pedals.
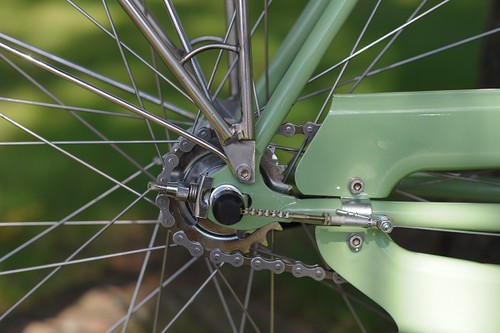
And the fork ends/dropouts (I like to remove those black dust caps, but forgot to do it here). You can also see the bungee cord attachment point on the rack here.
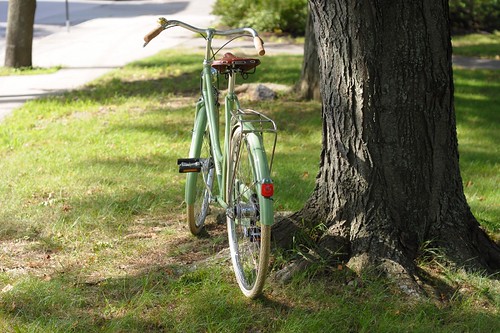
The colour of the bike as it shows up in the pictures here is fairly accurate. It is
not the same colour as my own bike, but a more vibrant, saturated pastel green. If you have any questions about the features, I will be glad to answer them here. I hope that the owners of these bicycles will be pleased with them - I am very happy with how they came out. There is some talk of more bikes, but nothing is certain yet - so your thoughts are welcome. Many thanks to
Bella Ciao again for the opportunity to work on this project, and many thanks to
Harris Cycley for all of their help.
 On an overcast day, the Vienna Citibikes really stand out! But are they too bright to ride? I admit that I have avoided renting these, because I don't fancy riding around looking like an enormous advert for a bank.
 Here are the tamer blue versions on the left, but they too are covered with enormous adverts. What do you think? More bout Vienna Citibikes here.

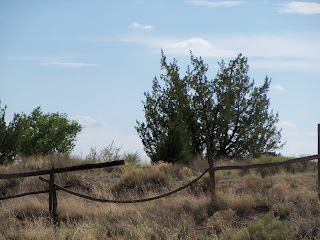
 These are photos I took of distance views from around Coronado State Monument. Of course the fences are new. 2nd photo shows a brush ramada or outdoor cooking area that would have been similar to those used by the Indians at the time the Spaniards first saw this area.
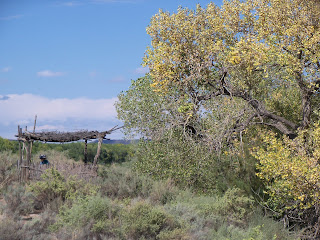


 On the edge of the meadow where the logging camp used to Lee and Tuffee check out the old truck.
 Seth dropping in the clearing (photo by Steve Machuga)
 Yes it really was that thick at times (photo by Steve Machuga)
 Coming out by headlamp (photo by Steve Machuga)


 Oh what a happy September 1st! I have a new bicycle!! More accurately, it is a newly-acquired old bicycle. This was completely unplanned, but the opportunity presented itself and I could not pass it up.
 This is a Raleigh DL-1 Lady's Tourist - one of the best known original loop-frame bicycles. I got it from a very nice local collector, and I really can't thank him enough. The 22" frame feels tailor made for me. The actual height of the saddle is the same as on my 21" Lady's Sports, because the seat tube on the DL1 is considerably more slack. This bicycle is in great condition. We will replace the tires and brake pads, and she will be ready to roll.
 As you can see, it is missing a chaincase - but I already have a lead on a full chaincase that should fit it. I also have a lead on a set of vintage-style rope skirtguards, the kind that connect to holes in the fender. I love the vintage bicycle community.
 Here is the 3-speed Sturmey Archer hub. Filthy but so sexy!
 And here is the gear shifter. The DL-1 has rod brakes, which I would not want on a commuter. But I am fine with them on a collector bicycle that I only plan to take on quiet rides.
 I have no place to store this bicycle, so I am still not sure how I will deal with it logistically! But this really is a vintage dream come true, so I will think of something. You can see how happy we are together, even before the chaincase/tire/skirtguard upgrades!


