
"The hardest part of this for beginners is usually the cleanup," Mike said at the start. "It's a lot of filing. That's what breaks people."
"Oh," I said. "Well, that shouldn't be a problem. I've done filing."
Going into this, I was worried about many things. The measuring, the cutting, the alignment, the brazing. But filing I could handle. I thought back to my days of intaglio printmaking (etching on metal plates). The person who taught me insisted that everything had to be done from scratch and manually - from cutting sheets of metal to preparing the plates. The latter involved beveling the edges at just the right angle, then endlessly filing, sanding and buffing them until the bevels were perfectly even and smooth, polished to a mirror finish. His insistence on this level of prep work had more than a few students in tears before we even touched ink or got anywhere near the press. But for some reason I stuck with it, eventually got the hang of it, and continued to use this method after I began to work independently. It just didn't feel right to do it any other way. Now whenever I see an etching, I can't help but look at the edges in search for file marks. All of this is to say, the prospect of filing for hours did not frighten me.
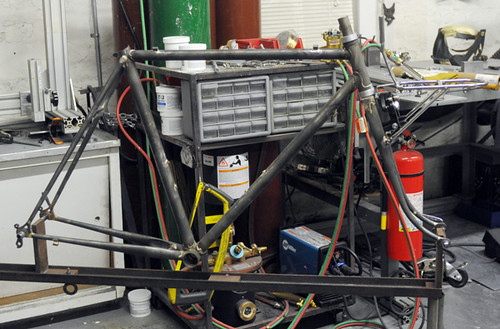
So how do I explain what happened a week ago? I don't want to exaggerate it into some dramatic melt down, but it was certainly a low point. A very long day, throughout the course of which I grew increasingly quieter and less bouncy than I had been up to that point. This was supposed to be the last day. So maybe it was the discrepancy between having believed I was almost done, and discovering more and more little things needing to be finished. All these little things added up, and taken together amounted to a lot of work. Bridges, bottle cage mounts, eyelets, braze-ons for cable routing.I had been awake since 5:30am. By 5:30pm, I was so tired that I had a hard time focusing. By the time we mocked the whole thing up to make sure the wheels, tires, rack and brakes all worked together,I was no longer fully present. At this stage we decided that the frame was finished - "good enough." But the feeling of satisfaction or at least catharsis that I had expected at the end did not come.
At home later that evening I did nothing and thought of nothing, feeling utterly dejected. It wasn't until the following day that I could even get myself to look at my pictures of the finished frame. And then I finally felt something: panic. "Good Lord, how could I leave it like this? This is
notfinished!" I could see smears of brass and silver. If I zoomed in closely enough, I could make out uneven surfaces. I had filed away at these areas, but apparently not enough. Mike had been right: like most first timers, I had flaked out on the cleanup. With horror, I imagined him powdercoating the frame as it was, uneven shorelines and all. Or, worse yet, putting the finishing touches on it himself, whilst chuckling "I knew the finishing would get her!" So I phoned him, trying to stay calm. He had not powdercoated the frame yet. And yes, fine, I could come over to continue working on cleanup. This put me in a fine mood.I showed up bright and early on a Friday morning full of energy.
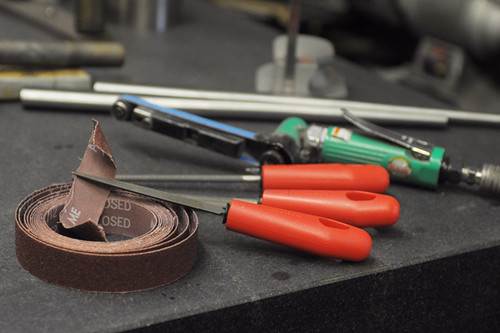
Somehow I maintained that energy for an entire day of using nothing but some files and emory cloth strips. All I did from 9:30am until 5:30pm, with a break for lunch, was file and sand, and it was tremendously satisfying. I guess having reached that low point my previous time at the shop, there was nowhere to go but up.
Mike had to go out for much of the day, and I was mostly on my own working on this. Not being able to seek feedback (Does this part look even? Did I file too much in this spot?) added a new layer of excitement to the process. When he returned, I think he was pretty amused by how cheerful I was after being at this for hours.
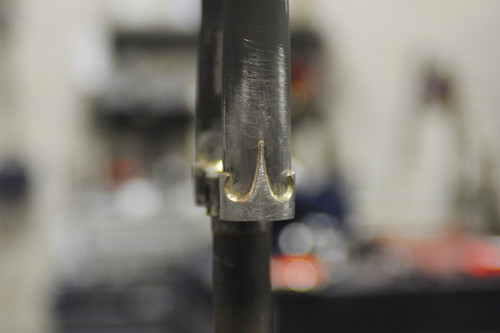
One of the trickiest parts to clean up was the area around the Grand Bois fork crown. Those curly-cues make it difficult to get the file into that little space and chisel away at the extra filler material without gouging the crown or blades in the process. It took me longer to get it to this state from this state, than it did to do the initial post-brazing cleanup. The trick is to dig into the shoreline build-up with the tip of a file, then angle the file just so to lightly and gingerly clean up the rest.
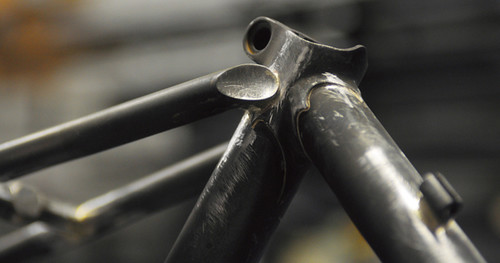
But the most challenging part of all was the seat cluster. My beautiful seat cluster! We made the seat stay caps from scratch to look exactly the way I wanted; it was the coolest thing ever. But during brazing I got a bunch of silver all over the caps, and was now terrified that in cleaning them up I would ruin their perfect concave surfaces. So ever so lightly, I dug into the tiny bulges with the tip of a file, using the most delicate micro-movements I was capable of to remove the filler material but not the steel underneath, then polished with an emory cloth until I got the stuff off. This took a while!
And so it went.The pictures here show the frame close to the point where I stopped, but not quite there.I didn't have the energy for pictures by the time I was done.
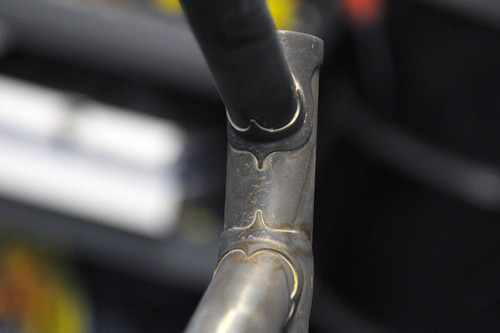
If you are wondering about the uneven looking surface from the sanding marks, they disappear after the frame gets sandblasted. The headlugs started out looking like this after brazing, then this, and eventually ended up as you see them above.
Don't get me wrong: The finishing on my frame still isn't "good" by real builders' standards. In fact I would not mind continuing to work on it, but unfortunately we are out of time. But at least now I can live with the state I left it in. And no matter how the bike turns out, I got the feeling of catharsis and closure I wanted out of the process. I learned how to build a bicycle frame (and fork!), from start to finish.
 The campground was on the top of a very large hill. The sites were quite nice, with a covered picnic table, which provided some protection from the sun but none whatsoever from the wind!


 Blue Sage sometimes called Russian Sage. It is really drought tollerent here in the desert but really, really hard to take photos of as blossoms are so tiny. It is blooming right now and starting to give me baby plants as it spreads well from seed.
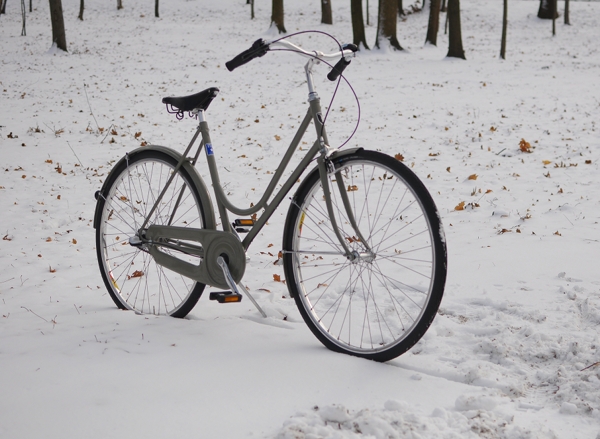 I have been looking forward to testing myBella Ciao ("Patricia")in winter conditions, and with the arrival of the season's first snow I finally got my chance. Before I go on, I will preface with the disclaimer / mini-announcement that I have begun collaborating with Bella Ciao on a special edition bicycle, which will be sold by Harris Cyclery in Spring . I will have more details about that soon, but just wanted to make that affiliation known in the meantime.
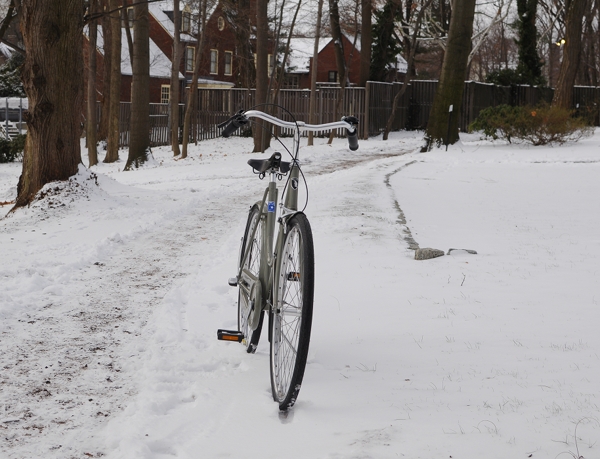 Though I love the way my Bella Ciao "Corvo Citta" model handles, I don't ride it as often as I'd like, because I haven't yet installed a rack and lights. Now that winter has begun in earnest, that will be my next project - I just wanted to first make sure that I'd actually be able to ride this bicycle comfortably in snowy conditions.At just over 30lb, the Bella Ciao is considerably lighter than the likes ofGazelle and Pashley, and - justifiably or not - I am weary of lighter bikes when it comes to cycling in poor weather. To my relief, I had nothing to worry about and Patriciahandled just fine after the first snowfall: She remained stable on slush, on slush mixed with salt, and on thin layers of packed snow.
 As with other bikes I have ridden in such conditions, I switched to a lower gear and went slower than usual. The bicycle remained sturdy and cooperative. When braking in slush, I used the coaster brake only, which I find easier to modulate on slippery surfaces. The bike also did well cycling on the slippery stretch of brickwork that was part of my route. As far as safety goes, I feel comfortable using the Bella Ciao as a winter commuter in Boston and will get on with the lights/ rack installation so that I can use it more this winter.
 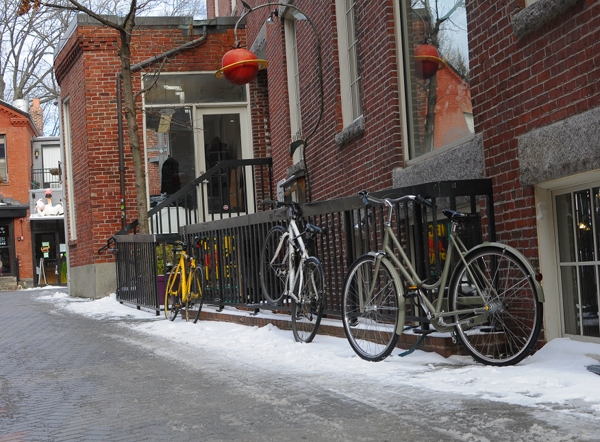 While the brave Patriciaperformed admirably, my first snow commute of the season was not entirely stress-free. Driver behaviour was chaotic and there were few cyclists out on the roads. Several times, I got spooked by a car's ambiguous maneuvers and ended up cycling through a mess of wet snow by the curb. Based on last winter's experience, I know that things will get better once drivers get into their "winter mode". Meanwhile, perhaps there is a reason why most cyclists seem to have chosen to wait it out!
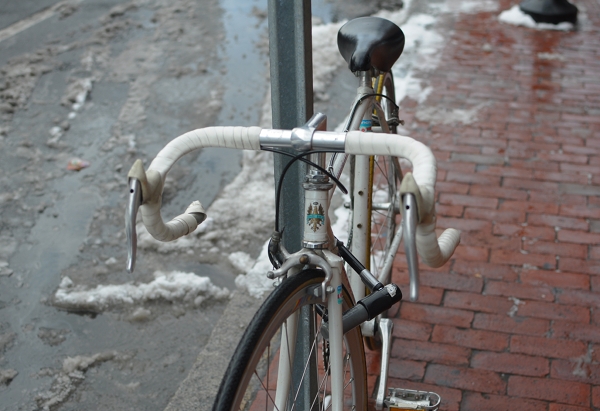 What I found fascinating about the Boston "bike scene" last winter and also noticed yesterday, is that often the only bikes on the streets seem to be those that are least suited for winter cycling - for instance, aggressive roadbikes with narrow tires and no fenders. Where are the fully equipped city bikes? Where are the rugged vintage 3-speeds?
 It could be, that the aggressive roadcyclists are the ones most likely to brave these conditions, while, ironically, having the worst possible bikes for doing so. That's too bad, because winter is the time when features like fenders, stable handling, wide tires, internal gearing, and an upright sitting position, really make themselves felt. Last winter, I was extremely appreciative of the Pashley I used to own, and this winter it looks like I will do equally well on the Gazelle and Bella Ciao.
 Though Patricia and I did not have many companions on our first snowy commute of the season, we hope that the winter wonderland will coax more cyclists outside soon. Once the drivers calm down, it is really not so bad: Just take it easy, dress warmly, ride a sturdy and properly equipped bicycle, and enjoy the beautiful landscape!
 I spotted this unseasonably floral bicycle in scenic Somerville. It is a
 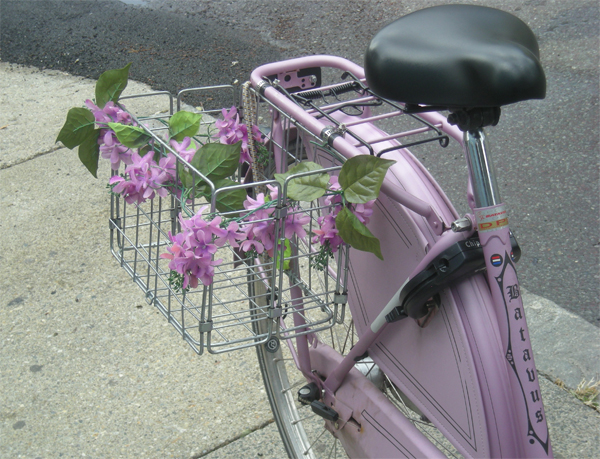 When it comes to pastel purple, the owner obviously follows the "more is more" principle - which I, for one, very much appreciate on dreary November days like today. (I wonder whether colourful bicycles could be used to treat Seasonal Affective Disorder, just like "light therapy"?)
 Hooray for lovely bicycles and have a good Thanksgiving!
 You can't quite see this here, but the model's underpants are semi-transparent. And the poster is sized and positioned in such a way, so that the viewer's gaze is directed at the space above the bicycle saddle. Right.
 Here is a bike tinkerer's parlour game for you: Assemble a complete bicycle using whatever wayward frame and spare parts happen to be in your possession at the moment. You can't go out and buy anything - not even cables or bolts. And you have exactly one evening. What would you come up with? The Co-Habitant ended up with something kind of neat. And mostly French. And both of us could ride it!
 The result so far is unexpectedly lightweight - especially compared to the Super Mirage the Co-Habitant had earlier. We took turns riding the bicycle around the empty neighbourhood in the middle of the night and marveled at how nice it felt. I've ridden lower end Motobecane bikes and have also tried a couple of higher end ones - but this one feels different from either. No toe overlap on the 58cm square frame.
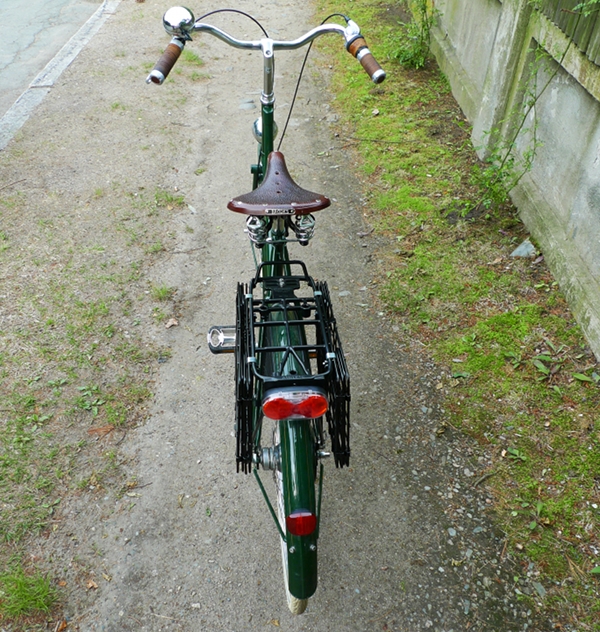 The
The 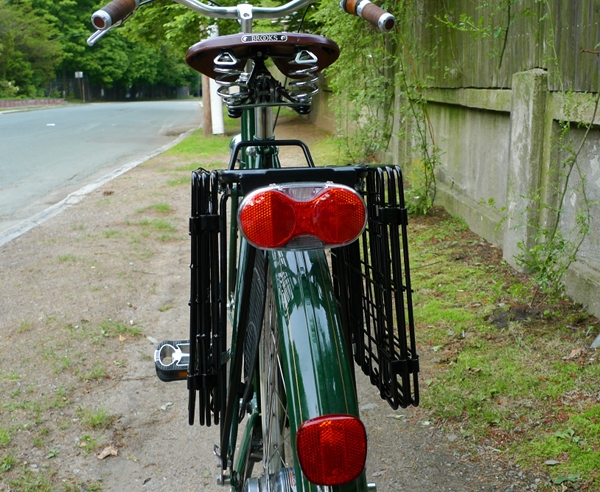 Anyhow, here they are on the
  The Co-Habitant carries one of those multi-use tools at all times, so he installed the baskets for me as soon as we bought them.
 Each basket mounts to the rack via 3 bolt-on metal brackets (which are included): two on top and one on the bottom.
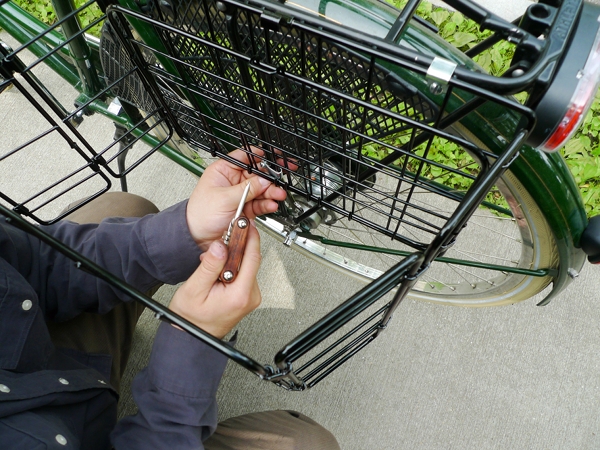 Here is the bottom one. Some people use zip ties in addition to or instead of the brackets.
 The baskets lie flush with the bicycle's rear rack when folded. To unfold, you lift a metal tab on top and pull out the sides.
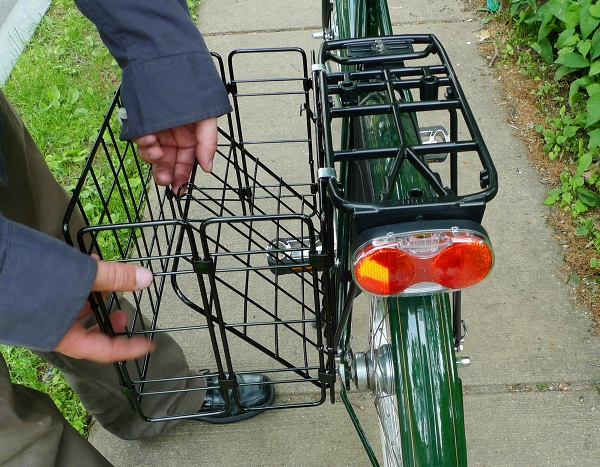 Then lower the bottom, click it into place, and
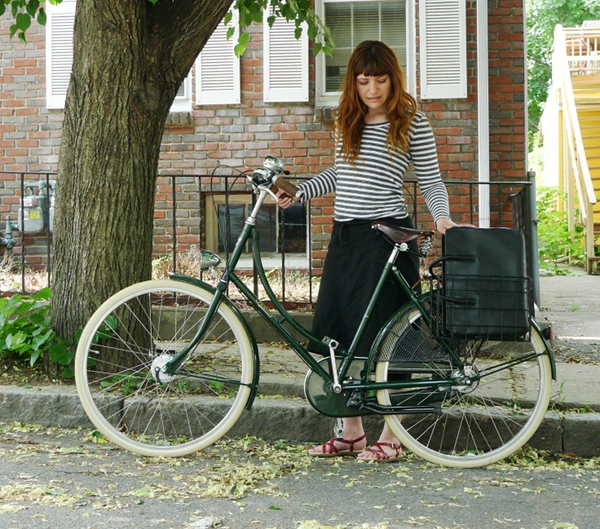 Here is the basket transporting my workbag - which houses my laptop, documents, and about a dozen other things. The bag is very secure in there, much more so than in the front wicker basket of yore. For me, this system really works. When cycling for transportation I prefer to keep my things in my normal, favourite workbag, and then to be able to place the bag into some form of container on the bicycle. Click-on panniers that double as laptop bags or handbags don't really do it for me, because I want to be free to carry any bag I want when off the bike - including my photo bag. Of course, an additional benefit of a metal basket, is that I can leave the bike anywhere and not worry about its bags being pillaged or removed.
 Here you can see the position of the baskets in relation to the rider. It's a very tidy system.
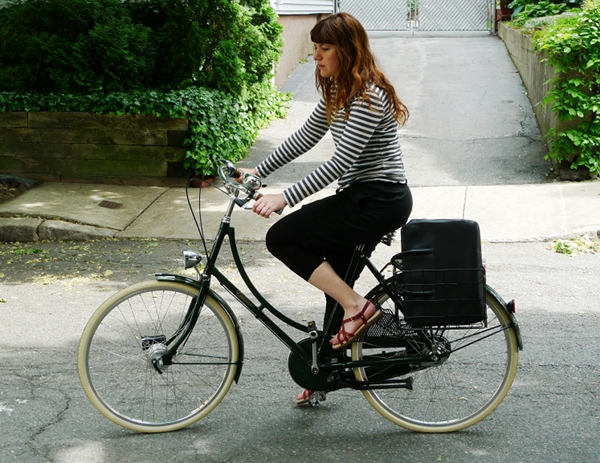 On my
On my  The final hard move on Echo Wall, Ben Nevis. This is a video still shot by Claire.
 Racking up for the lead, looking pale. Video still: Claire MacLeod
 At the shakeout before the most serious part of the climb. Video Still: Claire MacLeod
 Echo Wall, I am just pulling over the roof, low on the arête. Video still: Claire MacLeod
 Claire a tiny dot in Observatory Gully, left of the snow.
 Claire looking remarkably happy to be on the Ben after midnight!
 Looking west from Ben Nevis at the end of a long and perfect day's climbing.


