[Edited to add: There is now an updated review of this bicycle here. I suggest reading the updated version first, as it's the most complete.]
Meet
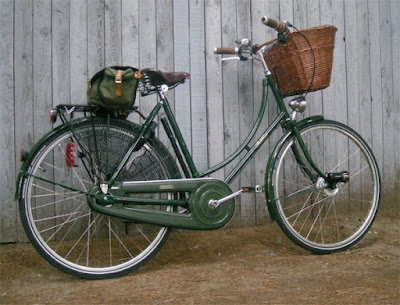
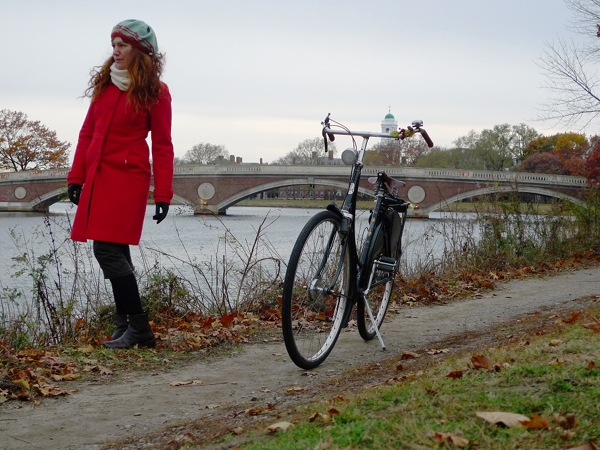
Eustacia Vye:my precious and unique beauty, made by Pashley and customised by the fine people at Harris Cyclery. If you are familiar with the works of Thomas Hardy, you probably got the reference of the name. (If not, read Thomas Hardy!) Eustacia roams the heaths and meadows with wild abandon, seducing those whom she encounters with her regal beauty. And she is excellent in Boston traffic.

Here are the front and back views. If you are interested in how I came to select this bicycle, you can read about it here.
 I. THE BICYCLE:
The Pashley Princess Sovereign is a classic "loop-frame" ladies bicycle. It comes standard with fenders, a fully enclosed chaincase, dress-guards, a heavy-duty black Pletscher rack, a hub-driven dynamo headlight and an LED rear light, a Brooks B66S saddle (sprung, suspended leather), enclosed hub brakes, puncture-resistant Schwalbe Marathon Plus tires, a pump attached to the frame with braze-ons, an "O-Lock" for the back wheel, a "ding-dong" bell, and an enormous wicker basket. My Princess is the 20" frame (51 cm), which fits my 5'7" (170 cm) proportions perfectly. Standard specs for the
Princess Sovereign can be viewed on Pashley's website here.

For those not familiar with Pashley, they are an English manufacturer and have been making traditional bicycles since 1926, specialising in transport cycles and classic English roadsters.
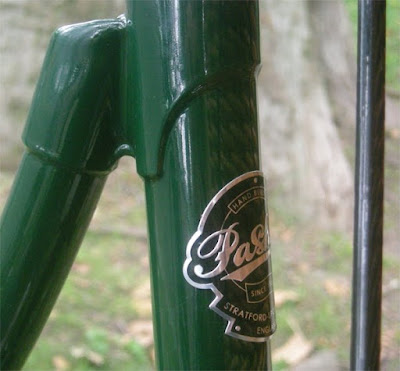
A close-up of the Pashley headbadge.
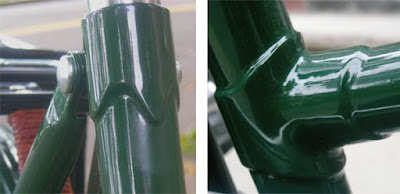
This is a traditionally lugged and brazed handbuilt frame. The frame is powder-coated and the paintjob is very durable (a powder coated finish will scratch and scuff, whereas a liquid-coated finish will chip). The Princess is available in two colours: "Buckingham Black" and "Regency Green." I chose the green, because it seemed to have a stronger personality, and because I generally like green bicycles. The shade is a dark and subdued "British racing green".

Pashley bicycles are made in Stratford-upon-Avon, England. Some cool photos of their factory, including the brazing process, can be viewed here.
 II. CUSTOMISATIONS:
As mentioned earlier, many customisations have been done to this bicycle. Here they are, not at all in the order of importance or magnitude:
Dress-guards: We replaced the standard dressguard pictured here with a netted dress-guard I bought in Germany. I wanted a dressguard that resembled latticed wroght iron rather than transparent plastic. This one certainly does. It also covers more of the wheel than the original dressguard.
Here is a close-up of the netting over the chaincase...
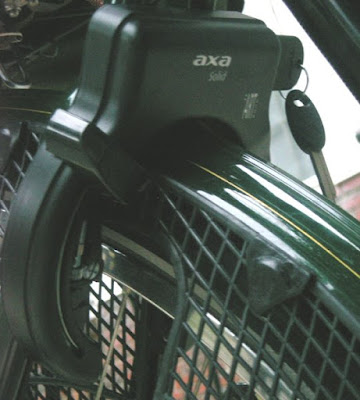
... and around the opening for the "O-Lock". The O-Lock is a European locking system that locks the rear wheel, making the bicycle impossible to be ridden away by a thief. In most areas in the US, it is probably prudent to use this for supplementary purposes only.
 Kickstand:
 We replaced the standard Princess kickstand with the Pletscher Twin-Legger, which provides support on both sides of the bicycle and lifts either the back or the front wheel off the ground (you can adjust the balance to determine which).
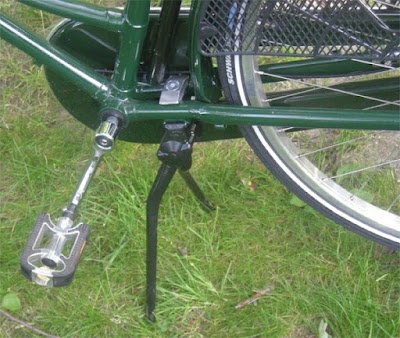
Not all bicycles will accommodate this kickstand, but the Princess has a special braze-on below the bottom bracket for this purpose.
 Grips:
 We replaced the standard Raleigh-style plastic grips with Brooks leather washer grips in brown. These are probably the most comfortable handlebar grips I have ever tried: They provide just the right amount of texture, softness, suppleness and durability. And they look gorgeous!
 Gearing and Brakes:
 But wait, what's this next to the right grip? The Princess Sovereign comes with a Sturmey Archer 5-speed hub. Mine has been replaced with a 7-speed Shimano Nexus coasterbrake hub (and yes, the gear-shifter has been twined and shellacked). This is by far the most dramatic customisation, and I cannot thank Harris Cyclery enough for doing such an amazing job.
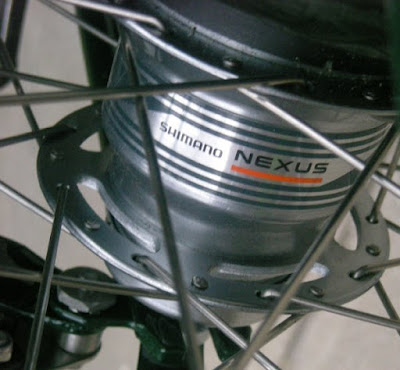
I wanted a coaster brake on the back wheel instead of the (hand-operated) drum brake that Pashley bicycles normally come with. Most people would have been glad to have the standard hand-operated brake option, but I wanted a coaster brake due to some problems with the nerves in my right hand. I can operate a hand-brake, but in stop-and-go traffic a coaster brake is more comfortable.
To accommodate this, the wheelbuilder at Harris Cyclery
rebuilt the back wheel of the bicycle. This was done so impeccably, that it looks stock and absolutely flawless. I also asked Harris to set the gears lower, to make it easier to climb hills. They used a 23-tooth cog, which provided the lowest setting possible, given the enclosed chaincase. The 2 extra gears that came with the Nexus hub were pretty helpful in the hill-climbing aspect as well!
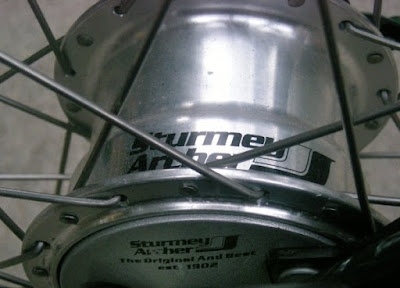
The front wheel retained the original Sturmey Archer hub dynamo/drum brake.
If you're confused, this means that I have a hand-operated front-wheel brake on the left handlebar, a 7-speed gear shifter on the right handlebar, and a coaster brake on the back-wheel that is operated with the feet by pedaling backwards.
Lights: We have added extra lights to supplement the standard lighting system.
Saddlebag: Not exactly a customisation, but the bag on the rear rack is a Carradice Barley. I absolutely love these remarkably roomy and attractive bags.
Initially, I had considered also replacing the basket and saddle, but on further testing decided to keep the originals. Please note that the 20" and 22.5" frames apparently come with a larger and more sturdy basket than the 17" frame.
 III. IMPRESSIONS:
My first impressions of Eustacia can be summarised as "gorgeous, fits me perfectly and rolls like a dream... but unreasonably heavy". I had tested the Pashley Princess before purchase and had also tried several Dutch bikes -- so I thought I was prepared for the weight. But that was before I had to carry it up and down the porch stairs every time I wanted to ride it. I admit that during the first few days of ownership, I cursed and despaired, gave myself many bruises, and almost fell down the stairs a couple of times under Eustacia's weight. I was pretty upset about it and could not reconcile the fact that I had the most beautiful, elegant bike in the world and found it unmanageable.
Then, after a week, something magical happened: The bicycle miraculously lost weight! Well, either that, or I developed arm strength. Either way, carrying it up and down the porch stairs now takes only a couple of seconds and I take it in stride. Do I wish it were a lighter bicycle? I honestly cannot say for sure: Its weight also contributes to its stability, comfort on the road, reliability in traffic and tank-like indifference to pot-holes. (
Edited to add: See also this post about speed
.)
 A summary of pros and cons:
Pros:
. stunning looks
. quality construction
. utilitarian add-ons
. luxurious accessories
. curved step-trough frame for easy on-off with skirts
. roomy and well-proportioned, with 3 frame sizes to choose from (I am 5'7", got a 20" frame, and can just reach the ground with my toes in the lowest saddle position).
. upright posture for relaxed riding, great views of surroundings, and visibility to traffic
. enclosed hub brakes make it weather resistant
. puncture-resistant tires are pretty much indestructible
. super stable
. handles extremely well in traffic
. sneers at pot-holes
Cons:
. heavy (specs state 45lb, but more like 50lb once you add accessories)
. not "agile" or sporty by any means; slow to accelerate
. upright posture restricts speed and uphill cycling
. saddle adjustment can be tricky with a "sliding off effect" unless perfectly tweaked
. if you are a private person who dislikes being approached by strangers, you might be overwhelmed with the attention this bike will get you. I get an average of 2-3 comments each time I take it out of the house.
 IV. CONCLUSIONS:
The Pashley Princess Sovereign will give you elegant utility, with the bonus gift of increased upper body strength. As a town-and-country bike and a transport bike, it is a success. An agile, sporty bike it is not (and to be fair, does not claim to be). As with any bicycle, you can always customise components, which includes lowering the gears if you live in a hilly area. Enjoy the city and the meadows, and be prepared for lots of attention when people see this bicycle!
 Edited to add
:
Since this review, I have aded updates that may also be useful:
Pashley Princess as winter bike
Pashley Princess after some modificationsPashley Princess with cream Delta Cruiser tires
For other perspectives on the
Pashley Princess, you may also want to check out...
.Miss Sarah at
Girls and Bicycles.Sigrid at
My Hyggelig.Michael at
EcoVelo
.Lorenza at
Where Do Roots Belong.Dottie at
Let's Go Ride a Bike
 This Fall I've been sick a lot, so I am using the downtime to knit. After making a couple of skirts, I moved on to a special project: hats and scarves specifically designed to resist the cold and wind while cycling.
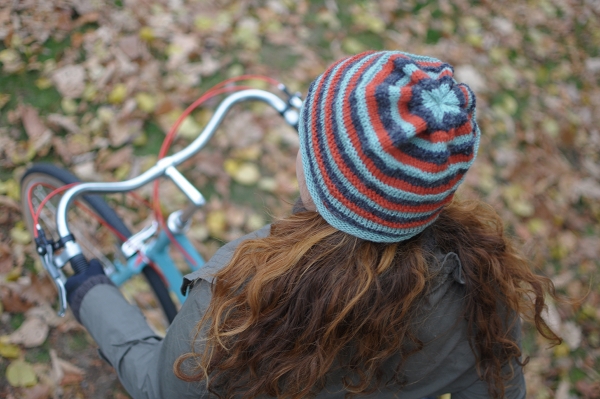 While it may seem that any hat and scarf should be sufficient for this, last winter I discovered that this wasn't so. Store-bought knits can be a mixed bag in terms of how well they work, even if they "look" warm and cozy. So while making my own, here are some criteria I've come up with that may help as you're winter shopping.
 1. Adequate coverage
 As for scarves, they can often come loose and unravel, or at least slip in a way that exposes your throat to the wind while cycling. If you have found this to be a problem, consider getting what is called a cowl neck, or a neck warmer instead. This is basically a thick, knitted turtleneck, without a sweater attached to it. You slip it on over your head and tuck the bottom under the collar of your coat. Unlike a scarf, it stays put and provides adequate coverage - even when cycling against the wind.
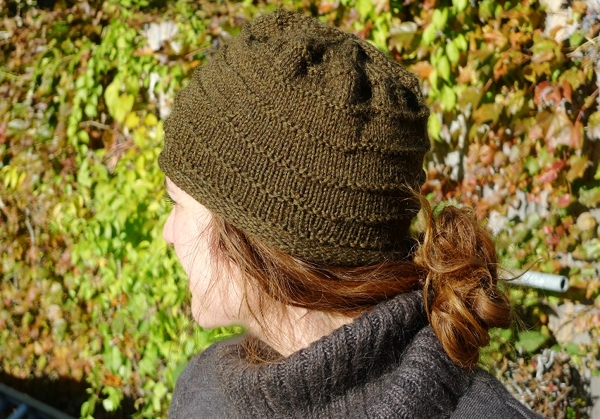 2. 100% wool
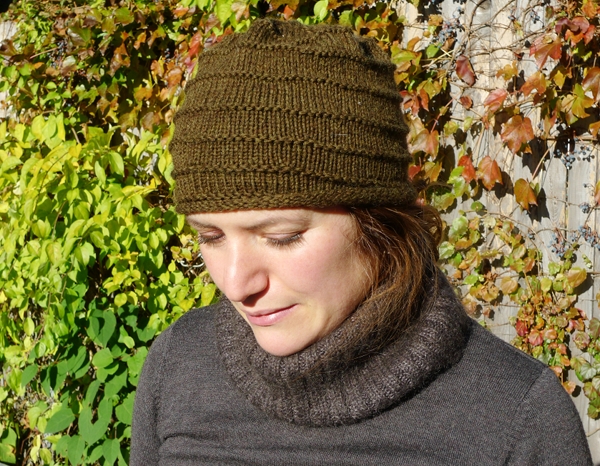 Some might worry about wool feeling scratchy agains their heads or necks, but today it is easy to find wool with soft textures - wool that feels cotton-like or silk-like. While cashmere is nice, it is not necessary if you can't afford it. To me, peruvian alpaca has a very pleasant feel to it, and it is fairly affordable.
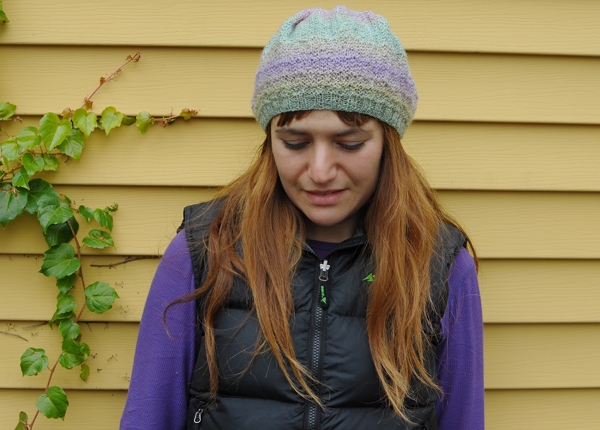 Even a gauze-thin wool hat can be surprisingly effective against the cold and wind while cycling. I made this one when it was still summer-ish, but it works well even in November.
 2. Dense stitching
 Cycling in the cold is a special challenge for knitted hats and scarves, because they need to remain effective when you are moving against the wind at 10-20 miles per hour.I own lots of knitted accessories, but when the temperatures fell to below freezing last winter, I discovered that only a few of them truly kept me warm.Pieces that provide full coverage of the ears and throat, are 100% wool, and are densely knit, will be up for the job where others fall short.
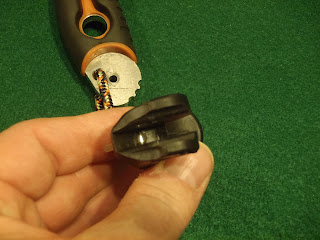
 4mm cord easily fits into the factoryumbilical hole if you want a lower profile umbilical attachment.
 Cord and pommel in place at the medium setting..but not bolted down yet. It had better be right when you put this all together because you won't be moving it again other than to replace it after you have added the epoxy bedding material.
 Easy to see here the tiny bit of pommel I groundoff to fit an umbilical clip cord if that is something you want to do while you are working on the shaft. The new pommels are aneasily replaceable part and inexpensive.
 In the pictures below I am holding the pommel so you can look down into the shaft's slot and see the single steel engagement tooth. I laid a thick layer of Steel Bed Epoxy into that slot which covered the single steel "tooth." Putting your chosen bedding compound-epoxy here will help prevent the shaft end of the tool from being strippedout by excess movement of the pommel in hard use. The idea is to reinforce the steel notch pin in the pommel by addingsome support with the steel based epoxy in the other adjustment slots.
 If you want to run umbilicals Petzl has made that easy now by the hole in the shaft able to take4mm or 5mm cord. Easy to grind off the back end of the pommels and thankfully not change the feel on the grip. 4 or 5mm cord will generally be about the same strength as the commercial umbilicals like Grivel's and BD's.

 It is indeed that time of the year. I was hoping for some rebate luck but looks like this year will be a dry one with no change, but maybe I am wrong with my math. We will see. My suspicions are there's more blue envelopes coming down to visit my mailbox.
 This year the Belastingdienst (Dutch Tax Department) is penalizing tax payers who do not file their taxes on time. I am cramming!
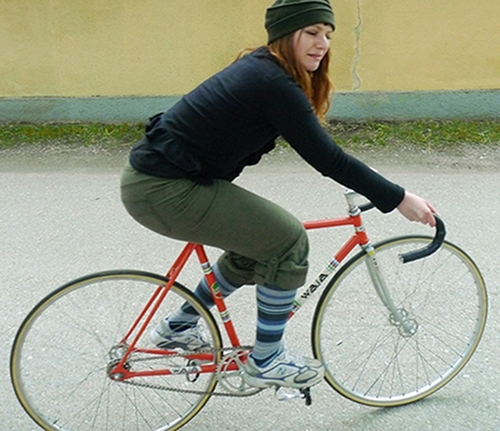 The idea of "toe overlap" or "toe clip overlap" (TCO) is one of those hot button topics that can causemetaphorical bloodshed in online discussionsamong bicycle enthusiasts. Still, I would like to have a go at it, as I think my perspective reflects the type of cyclist who does not typically take part in these debates. I would also like to discuss the topic from both sides of the argument, encouraging readers to form their own opinions. In short, here are my 2 cents:
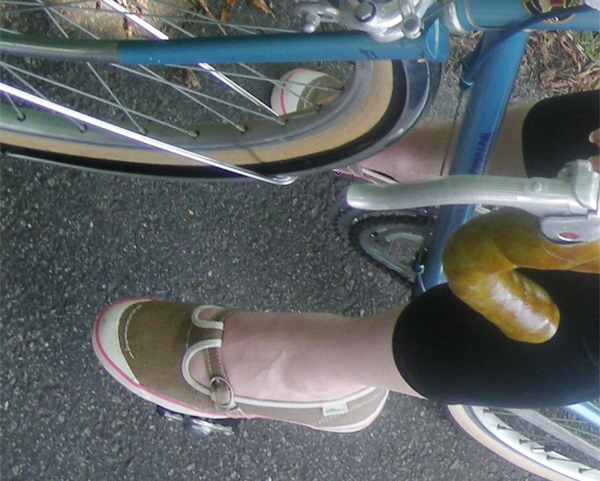 Is toe overlap a problem?
 What can be done to avoid toe overlap on small size bikes?
 Conclusions?
 We finally made it Yorktown Victory Center. For those that don't know, Yorktown is the site where the British surrendered to the American and French troops, effectively ending the six year Revolutionary War. The Victory Center is a living museum, and we love living museums so it was a treat to visit here. We saw the encampment first:
 While here, we saw two military weapons being fired. The first was a cannon and the second was a mortar. Cannons shoot solid balls and mortars shoot bombs. The man talking during each told us lots of interesting things like that.
 We talked to a man who shared about the medical field during the War. We learned fun things like how bullets were removed using the finger, what they used to disinfect and anesthetize during surgeries and what things caused mass sickness. The man who shared there used to be a teacher in schools. He decided this was a way more fun way to teach/learn. We get that!
 We also hit the inside museum galleries. We watched a movie and learned more about what exactly happened here and why it was such a critical part of that war. We laughed at some parts like when they talked about a drunk soldier mooning the British army.
 And then we walked past the farm part to see if it was something we'd want to visit next time we come here. It was!
 We had a great time here and hope to visit again when we come back.


